Hello inhabitants of a remote and unexplored planet full of life, richness and natural resources.
The group of entities we are bringing to high resolution currently is the combinators. The main problem with them is the amount of shifting values needed, so we used a specific workflow which I will try to show and explain today. Some of the parts have already been described in FFF 146, so I will only mention what is necessary for this article.
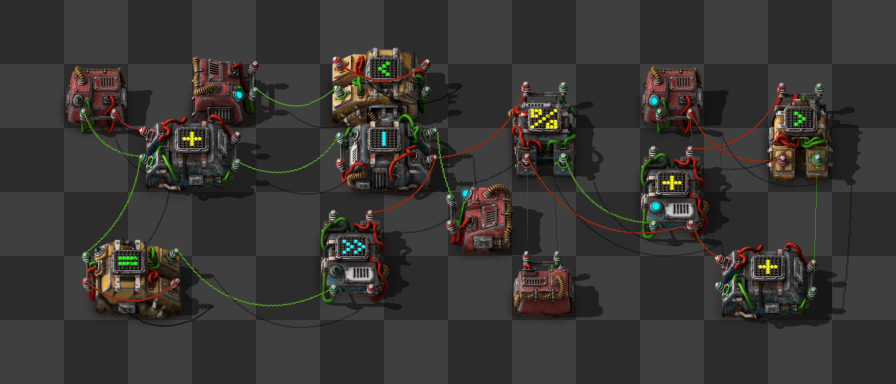
Please fasten your belt as this will be a ride full of automation.
Here it all starts. As you might already know, almost everything in Factorio comes from 3D models created in Blender. This time I already had the combinator models ready as we updated them relatively recently (in 0.13).
In 0.15, we added many new operations for the combinators, which required additional display graphics, some of them having quite complicated shapes. For some obscure reason I was afraid that the old matrix of lightbulbs wouldn’t be able to represent such detailed symbols so I increased the resolution from 7x7 to 15x15. I wasn’t too happy with the result, but at that point time was a big pressing factor so we just kept it. The thin lines however lose quite a bit of the granular display nature and they behave quite poorly when zooming out.
Now when I had the chance of revisiting combinators, I tried to redo the symbols with 9x9 as I was thinking “Well, I probably abandoned 7x7 for a reason so let’s not try that.” However, I quickly found out that it’s actually very easy to fit all of the symbols in 9x9 so I tried 7x7 out of curiosity. I was very surprised to see that it’s actually totally fine and there was no reason to abandon the 7x7 grid. So, here you can see all the old-new displays.
![]()
Once the 3D models are prepared, I could get into rendering them very fast just by changing a handful of values. You can see that the original scene was already prepared for resolution doubling.
It’s worth mentioning how the rendering system actually works. The combinator objects are split into layers, separating horizontal and vertical models (because they are different due to projection), and rotating them between frames 1 and 2 in time.
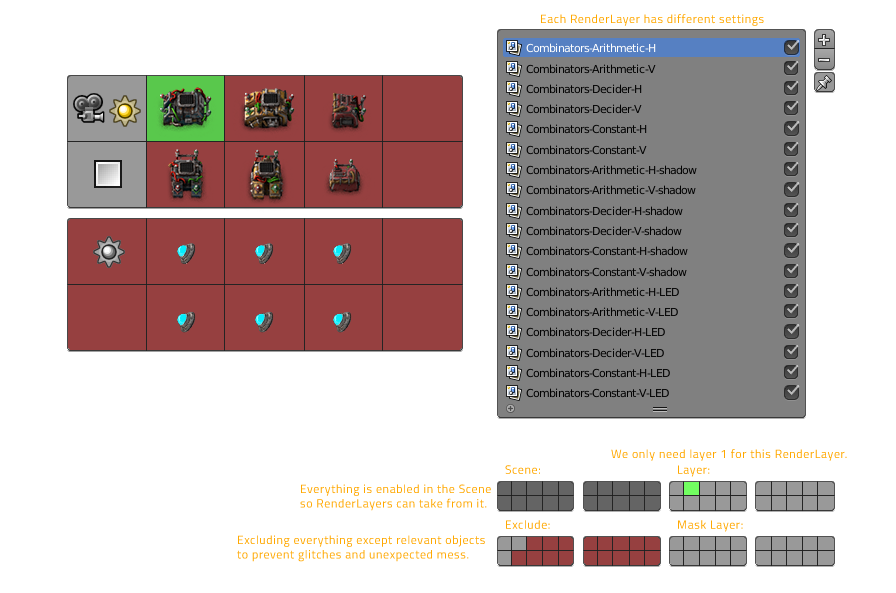
With this, we can assign RenderLayers to combine the layers and output what we want. The next step is naming the outputs correctly and putting them in their own folders - for that we use a fake rendering scene which has only one purpose - collect the RenderLayers from the real model scenes, and save them to disk.

Once that all works we just need to press one button to output everything.

Many things can be achieved in a 3D program, but human touch in Photoshop is always a very vital step for vast majority of our graphics. The main technical criteria for Photoshop output is the ability to import the working file into After Effects as separate layers. I will show why this is necessary later.
Since there are 12 combinator variations, maintaining your 12 PSD files would become a pain sooner or later for many reasons, so I import everything into one big file. Here I typically space the imported layers out so that I can see and edit everything at the same time. We will center them back later. This way I can paint on all of them together which not only saves time otherwise spent by switching files, but it also lets me see the differences and make sure I'm not overdoing it on some of them.
Typically we duplicate the layers twice (groups in this case) and blend them with Screen and Multiply modes. Of course the blending only happens in carefully hand-painted spots, which gets us to the outputs we are trying to get out of Photoshop - masks which control the correction seen above. This is how one of them looks like:

A special thing to mention, we also generate ground integration with Drop Shadow functions in Photoshop, which has to be merged in a single layer so it could be exported. The problem with this is that it has to be done manually so again doing it just once in one big photoshop file is faster than in 12 different files.
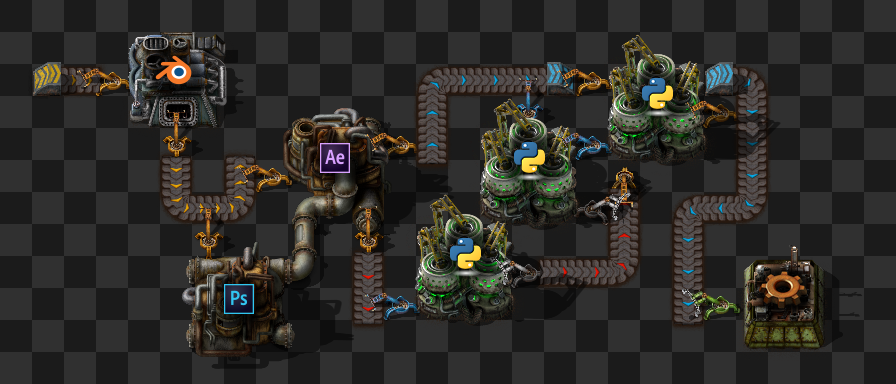
The place where everything fits together is After Effects. Here we bring all of the rendered outputs from Blender together with the masks exported from Photoshop, and with some system combine them into image sequences which will later be processed by python scripts.
The obvious thing to do first are the combinator sprites, this is using the quite typical system of taking the rendered sprite, masking it and duplicating it to screen/multiply blend itself, of course feeding it the mask from Photoshop. The Photoshop masks are imported directly from the PSD file as layers, which is why it's important to have them ready for this step. In After Effects they have to be centered back to fit the render, to compensate for the spacing in Photoshop.
After that it’s just doing the same for all combinator types, rotations and shadows. The pipeline can look like this:
The exact same applies for shadows. Rotations, dance!
This After Effects pipeline is quite typical for all of our entities. The system can differ in complexity but it’s something similar. The special part here is that combinators have a huge amount of shifting values for the wire connections in Lua, and we need to somehow define them. To be more specific, we have:
Even though the constant combinator doesn’t have any input, it still totals 80 shifting values just for the wire connections, not even mentioning shiftings for the displays, activity LEDs and the combinator graphics themselves. Doing each point manually would be insanely tedious, time consuming and to redo it you simply have to do it all over again, at which point you might as well just go hang yourself with a red and green cable.

When we combine it all, in total we exceed 111 shiftings. Because we are proper Lazy Bastards, we have a special pipeline to prevent doing all this manually. (Automation, anyone?)
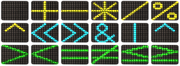
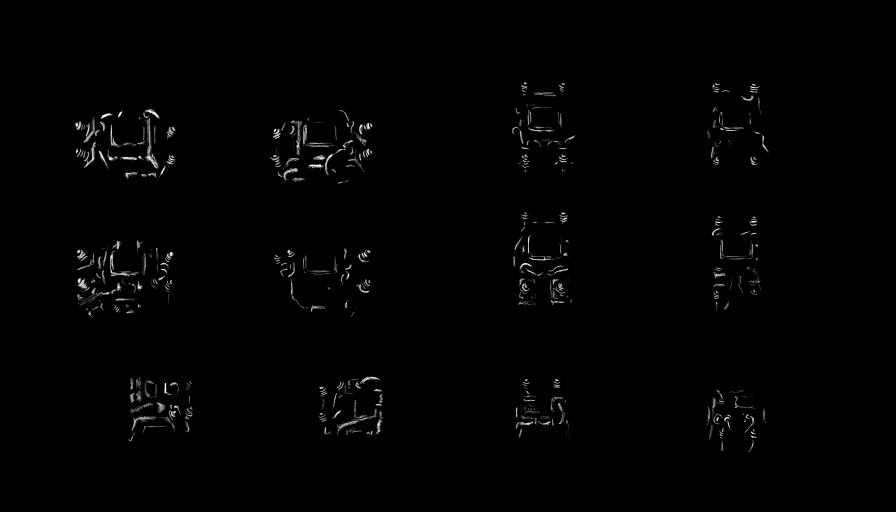
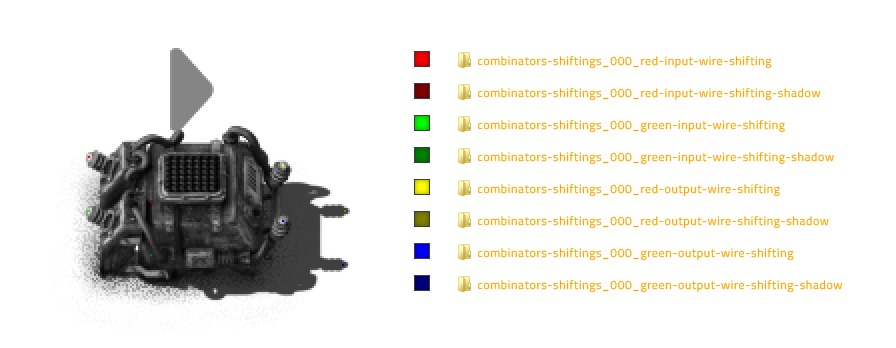
In After Effects we take the centered sequence of combinator sprites and desaturate them. On top we put 1 pixel indicators for the wire connection points. The result looks like this, note the small colourful spots. The gray arrow is just for debug and to prevent mistakes.
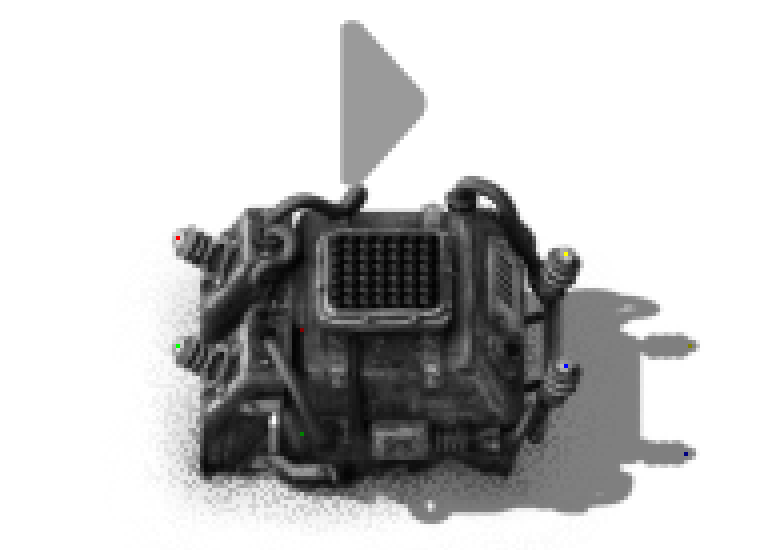
The previous picture alone isn’t very useful as we do not have a tool which would just calculate the shifting outright so we need to process the pictures and filter them by colour. Each of the coloured pixels is going to be split into one file which results in a funny picture which has just 1 pixel for you to find in case you want to have a look manually. There is a simple colour code for the filtering:
The aim is to separate them all into their own exclusive folders, where they will be waiting eagerly to be processed and spat out by the next assembling machine script…
We already mentioned multiple times that we are using an universal python script to crop images and calculate the shifting required to re-center the cropped picture. This is generally useful simply because it’s cropping the data to the minimum possible bounding box, minimizing the file sizes of the game and leaving less work for texture Atlas cropping during loading time.
Now we can use this tool to calculate the wire shiftings for the combinators from the single-pixel images from the previous step. This doesn’t happen magically by itself, we still need to tell Spritesheeter what to do, so we can just casually generate the .bat command for Spritesheeter by another python script. Spritesheeter devours its prey per folder, which is why we separated each of the shifting pictures into their own folder. The output is 80 text files which look something like this, focus is of course on the 'shift = ...' line.
![]()
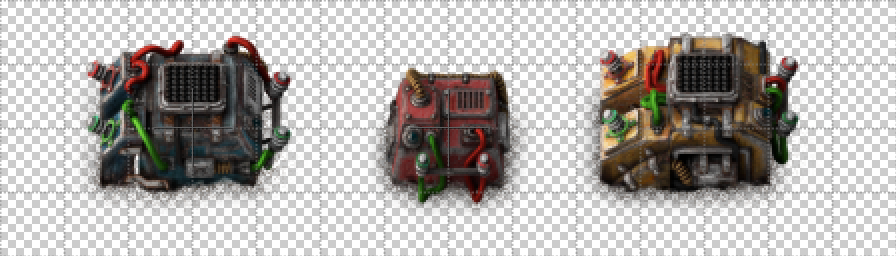
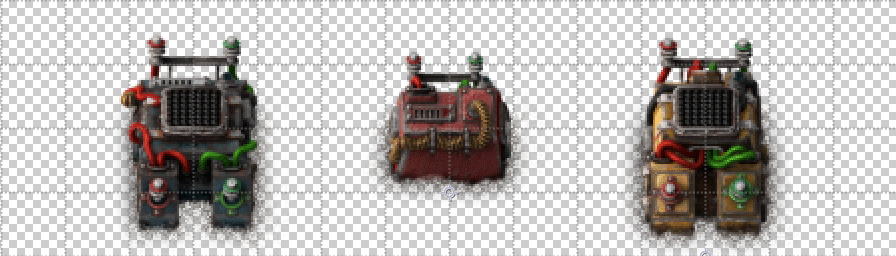
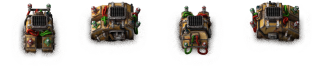
Note: the real combinator sprites, activity led and display sprites also go through Spritesheeter, outputting whole spritesheets where possible, like for example those two.

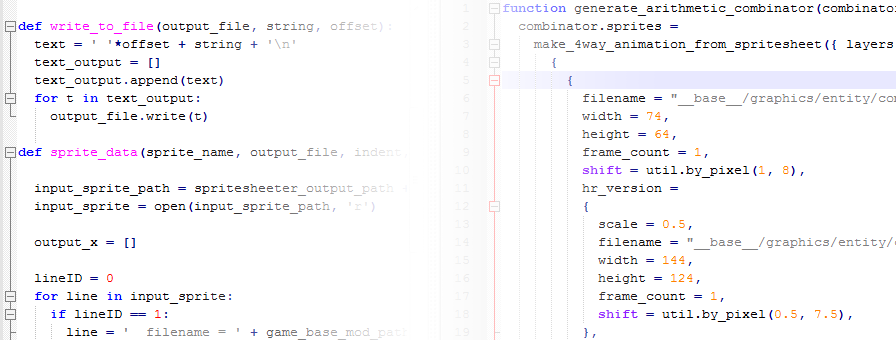
If you ever looked into entities.lua and searched for combinators, you probably noticed that it has quite a bit of code. More specifically, whole file has about 12,500 lines. When we separated combinator pictures (not even the whole code), it dropped to 10,500. That’s 2 000 lines of Lua mess to define the new graphics in. It’s safe to assume that it could take me over 2 days to do all this manually so I decided to generate the whole combinator-pictures.lua with another python script automatically.
Since I don’t have that much programming experience, I obviously quickly discovered that it isn’t as easy as I imagined it to be, and I quickly got into readability problems so I had to do some code cleaning up because I just got absolutely lost in it at one point. Even now it still has some messy parts, but overall it was a quite straight forward process.
It took me about 4 days it probably took a bit longer (about 1-2 days) than doing it manually, although if I had to redo just half once, it might have already evened out, but that’s all just guessing. Even fixing mistakes and errors is much easier as I can just fix a few scripts and re-generate the whole thing within seconds. Most importantly, I learned a lot of new things, and we can reuse the processing pipeline in similar entities like the electric poles or circuit connector module (the yellow box which appears when you connect something to circuit network), and many others.
We have pictures and code but we need to put all these files in the game. Taking the files manually and putting them into the game is not terribly hard, but you can forget some files, place them in wrong locations, or the folder/naming system between the game and the working directories can simply be different. So it’s very convenient to write another script which actually copies the files to the local git repository, after that it’s just about starting the game and seeing how it works.
Of course the code seemed to be correct by eyeballing it, but the game is stubborn about syntax and all those unimportant things so I had to do some fixes. This was a repetitive process between editing the 06-Lua generator and putting the files into the game, sometimes even having to re-generate sequences from After Effects and running the whole processing pipeline again.
After doing this a few times it was time for automation so I added a script which automatically triggers all of the 04-07 scripts, letting me to just fix issues and see them in action with just one double-click.
The whole process isn’t exactly short, but automating the steps helps so much, especially when we get to the last step of really making it work right. At that point it is extremely important to be able to say “Can we change this, can we improve that?” and your answer is “Yeah, just change these two things and let it re-generate.” It lets you focus on quality instead of thinking how much time would it take to do all the process manually again, and I really enjoy working this way, not to mention that every time I learn something new to make the tools even better and faster next time. Doesn’t that remind you of some game?
While we're on the topic of combinators and automation, Reddit user /u/mgabor has spent the last month working on an automated way of importing MIDI to Factorio as programmable speaker songs, introducing MIDItorio.
Hopefully this article was interesting for you, let us know what you think on our forum.